Steps to Download Java
Navigate to https://www.java.com/
Click on Free Java Downloads button.
Click on the Agree and Start Free Down Button in the page as shown below.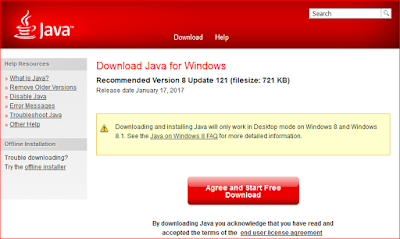
Steps to installing Java.
After Java is installed, the next step is to set the environment variables.
Steps to setup Environment Variables:
Navigate to the path where Java is installed and go to the path until as below
C:\Program Files\Java\jdk1.8.0_65\bin
Copy the above path and Right-click on MyComputer -> Properties.
Click on Advanced System Settings and click on “Environment Variables”. In the System Variables, paste the above-copied path and paste in the Path field. Click OK and Click OK
Note: To verify if Path is set correctly, Go to Command Prompt by typing cmd in the Run and then in the Command Prompt type javac and should return list available as below:
Download Selenium WebDriver based on language in which you want to use for Automation.
Say you can use Java, C#, Ruby, Python, etc. The most widely used and famous is Selenium WebDriver with Java because Java is Platform Independent.
Below are the steps to download Selenium WebDriver
Navigate to www.seleniumhq.org
Click on the Download tab in the Tab
In the Selenium Client & WebDriver Language Bindings, click on the Download link adjacent to Java.
Once the download is completed and extraction is done, below is how the folder contains

Libs folder contains a few more Executable Jar files.
Note: These jar files are required while writing the Selenium web driver code in Eclipse IDE. We need to assign these jar files to the Project
Download Eclipse IDE (Preferably Eclipse LUNA)
Link to download Eclipse LUNA
http://www.eclipse.org/downloads/download.php?file=/technology/epp/downloads/release/luna/SR2/eclipse-jee-luna-SR2-win32-x86_64.zip
Note: Eclipse IDE is not an executable file. We need to go to the Folder and click on the Eclipse Icon which is as shown below

Once we click on the Link, Eclipse IDE will be opened, create a Workspace


After we create a Workspace, below is the First Screen of Eclipse IDE

Steps to Create a New Project
Click on the File -> New Project
Select Java Project from options available and Click on Next
Give the Project Name and Click Finish


The project with Name given above will be created and below is how it looks.
Now In the Project Folder, we need to create below:
Create Package by right click on the Project and Select New -> Package. Fill Package Details and Click on.
Create Class inside Package by right click on the Package and Select New -> Class and give the Class.
Name (Preferable Class Name should start with Upper Case.
If a Class Name contains more than one word, then every first character of the word to be in Uppercase. Say Example LoginModule.


After New class is created, Eclipse IDE will create the default Java Class template as below:

Now we need to assign the Selenium WebDriver Java jar files which we have downloaded in Step2 so as to make those classes available to the classes in our Project which will help us to import the packages very easily.
Steps are shown as below:
Right-click on the Project and Click Properties option.
Select Java Build Path and click on the Add External JARs… option.
Navigate to the jars which we downloaded in Step 2 and Assign those
Say Click on Add External Jars and Assign 2 selenium Jars.
Click on OK, then again click on Add External Jars and assign the Jars which are in the libs folder. Then click on Ok and close.
Now the jars are assigned to the Project

In the Project, one more category with name Referenced Libraries would be created which will have all the Jars which we have assigned. Shown below:

Details: https://www.softwaretestinghelp.com/selenium-tutorial-1/
Navigate to https://www.java.com/
Click on Free Java Downloads button.
Click on the Agree and Start Free Down Button in the page as shown below.

Steps to installing Java.
After Java is installed, the next step is to set the environment variables.
Steps to setup Environment Variables:
Navigate to the path where Java is installed and go to the path until as below
C:\Program Files\Java\jdk1.8.0_65\bin
Copy the above path and Right-click on MyComputer -> Properties.
Click on Advanced System Settings and click on “Environment Variables”. In the System Variables, paste the above-copied path and paste in the Path field. Click OK and Click OK
Note: To verify if Path is set correctly, Go to Command Prompt by typing cmd in the Run and then in the Command Prompt type javac and should return list available as below:

Download Selenium WebDriver based on language in which you want to use for Automation.
Say you can use Java, C#, Ruby, Python, etc. The most widely used and famous is Selenium WebDriver with Java because Java is Platform Independent.
Below are the steps to download Selenium WebDriver
Navigate to www.seleniumhq.org
Click on the Download tab in the Tab
In the Selenium Client & WebDriver Language Bindings, click on the Download link adjacent to Java.
Once the download is completed and extraction is done, below is how the folder contains

Libs folder contains a few more Executable Jar files.
Note: These jar files are required while writing the Selenium web driver code in Eclipse IDE. We need to assign these jar files to the Project
Download Eclipse IDE (Preferably Eclipse LUNA)
Link to download Eclipse LUNA
http://www.eclipse.org/downloads/download.php?file=/technology/epp/downloads/release/luna/SR2/eclipse-jee-luna-SR2-win32-x86_64.zip
Note: Eclipse IDE is not an executable file. We need to go to the Folder and click on the Eclipse Icon which is as shown below

Once we click on the Link, Eclipse IDE will be opened, create a Workspace


After we create a Workspace, below is the First Screen of Eclipse IDE

Steps to Create a New Project
Click on the File -> New Project
Select Java Project from options available and Click on Next
Give the Project Name and Click Finish


The project with Name given above will be created and below is how it looks.
Now In the Project Folder, we need to create below:
Create Package by right click on the Project and Select New -> Package. Fill Package Details and Click on.
Create Class inside Package by right click on the Package and Select New -> Class and give the Class.
Name (Preferable Class Name should start with Upper Case.
If a Class Name contains more than one word, then every first character of the word to be in Uppercase. Say Example LoginModule.


After New class is created, Eclipse IDE will create the default Java Class template as below:

Now we need to assign the Selenium WebDriver Java jar files which we have downloaded in Step2 so as to make those classes available to the classes in our Project which will help us to import the packages very easily.
Steps are shown as below:
Right-click on the Project and Click Properties option.
Select Java Build Path and click on the Add External JARs… option.
Navigate to the jars which we downloaded in Step 2 and Assign those
Say Click on Add External Jars and Assign 2 selenium Jars.
Click on OK, then again click on Add External Jars and assign the Jars which are in the libs folder. Then click on Ok and close.
Now the jars are assigned to the Project

In the Project, one more category with name Referenced Libraries would be created which will have all the Jars which we have assigned. Shown below:

Details: https://www.softwaretestinghelp.com/selenium-tutorial-1/
Comments
Post a Comment